Lazy by nature
There is a commonly known rule of energy conservation in the universe, that requires little to no introduction here. We often try to distance the image of human nature from dependence on external rules governing our world, defending it from the whims of subconscious instincts using notions of self-determination and free will. The thing is - some of our mental building blocks are made of those simple mechanisms, programmed eons ago to ensure that we carry on perfecting our civilization, autopiloting our survival through the everyday grind. And just like those single-cell organisms, we conserve as much energy as possible, whenever we can i.e. we are lazy by default (speaking from the point of view of efficiency in managing our resources) and that is a good thing.
Accepting this fact, we should cherish this trait of ours and use it to our advantage, whenever we can and whenever it does not hurt our ambitions too much (or at all). And that is my justification for finding ways of not leaving the VSCode window if there is a way to migrate some of the tasks I do to the editor itself.
Lately, after my first adventures with my [Rust particle simulator], I've been polishing up my Rust skill by doing LeetCode problems, starting from the easy ones and slowly climbing up its algorithmic ladder. Normally, I would use the LeetCode website to do that, but there are a couple of things that bother me about it:
- I start to miss my extensions such as CodeLens, GitLens, etc.
- I like to use code-formatting tools such as
cargo fmtandrustfmtto keep my code clean and tidy, and to familiarize myself with the Rust style guide over time. - In the future, I would like to be able to keep different implementations of the same problem in one place, so I can easily compare them and see how my skills have improved over time or do the same routing but in different languages.
- I can't control the layout of windows and tabs in the LeetCode webapp, which is sometimes helpful when I want to manage multiple pieces of information or compare docs with my code and have everything in one place.
- I want a setup that at first glance shows me my progress, without having to open the browser and log in to the
So, I want to minimize the amount of context switching between the LeetCode website and my editor, because it is distracting and it breaks my flow. I want to be able to do everything in one place. Because going back and forth between the browser and the editor is a waste of time and energy, both of which I want to conserve.
Chinese doodads to the rescue
There is a very popular [extension in VSCode marketplace called simply LeetCode] which tries to streamline the process of solving LeetCode problems in the editor, made by (from what I understood after a quick Google investigation) Chinese branch of LeetCode. Even though it is in the alpha stage, it is quite usable and it has some nice features, such as:
- Problem list - a list of all problems available on LeetCode, with a search bar and a filter by difficulty.
- Problem description - a window with a problem description, which can be opened in a separate tab.
- UI enhancements - a couple of buttons that allow you to submit your solution, run tests, etc.
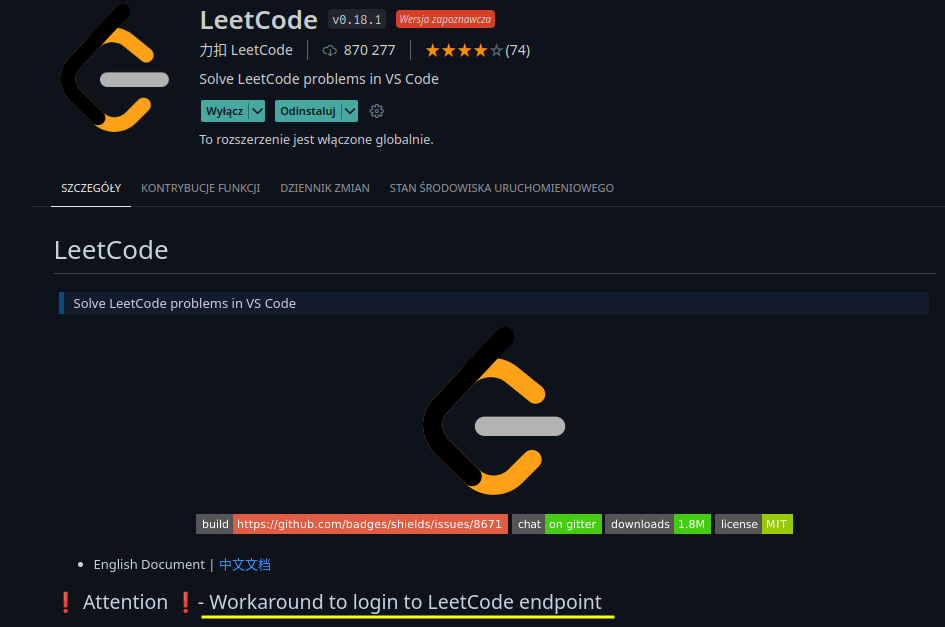
However, it has one problem right now, which makes it slightly harder to login to the LeetCode website because it rejects third-party authentication methods (such as Google or GitHub). Also, the login via LeetCode credentials using VSCode UI is not working for me, so there is one final option left - using the browser to login and then copy-pasting the session cookie to the extension dialog box.
This can be done by opening the extension menu on the left side of the VSCode window and clicking on the "Sign In" button, which will open a submenu with a "Sign In with Cookie" option. After clicking on it, a dialog
To get it, you need to open the LeetCode website in your browser and use the developer tools available in it, which can be usually opened by pressing F12 or Ctrl+Shift+I (on Windows). Then, you need to go to the tab that shows requests being made by Your browser whenever You reload any of the LeetCode pages. In my case, I am using Google Chrome which has a Network tab in its DevTools, where I can access this information.
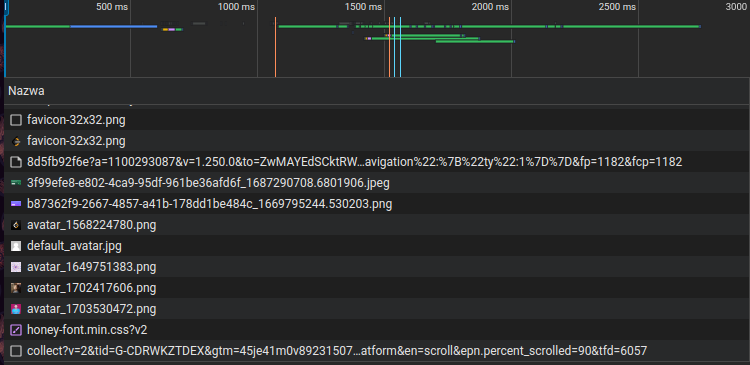
The list presented above shows a snippet of requests made by the browser, but we are interested in the ones that are named graphql, since they are the ones that contain information about our credentials being passed around the LeetCode site after logging in. More importantly, we are interested in the first entry which is named like this - the other ones are not important to us. After clicking on it, we can see the details of the request, including its headers. We are looking for a header named Cookie, which should be present under the Request Headers section.
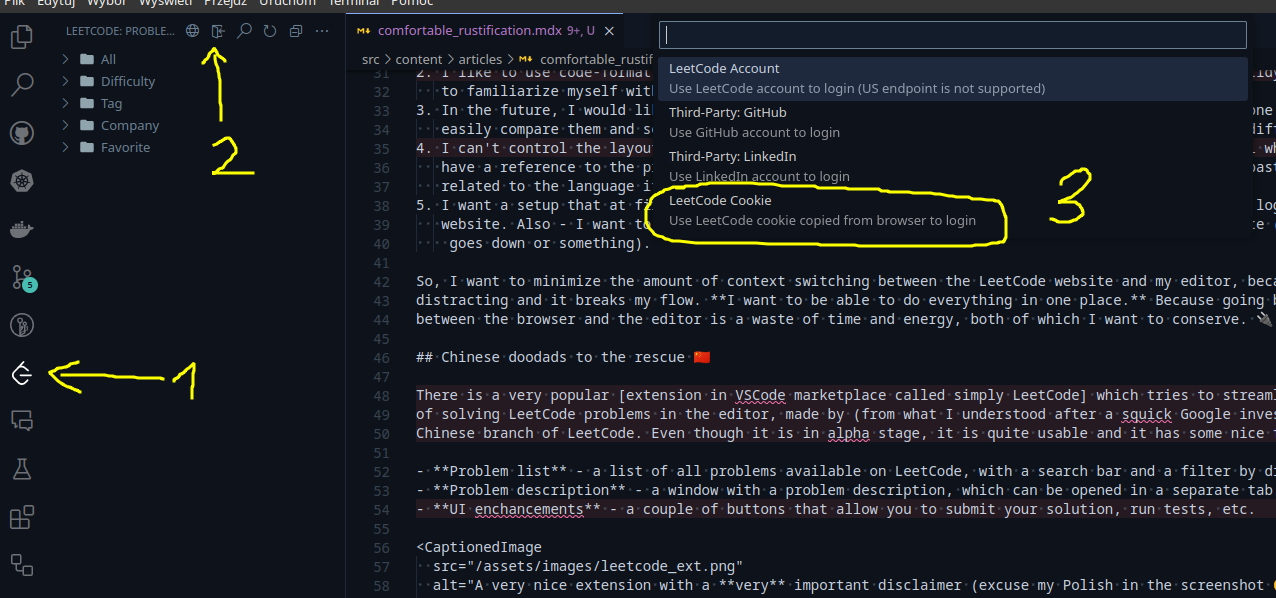
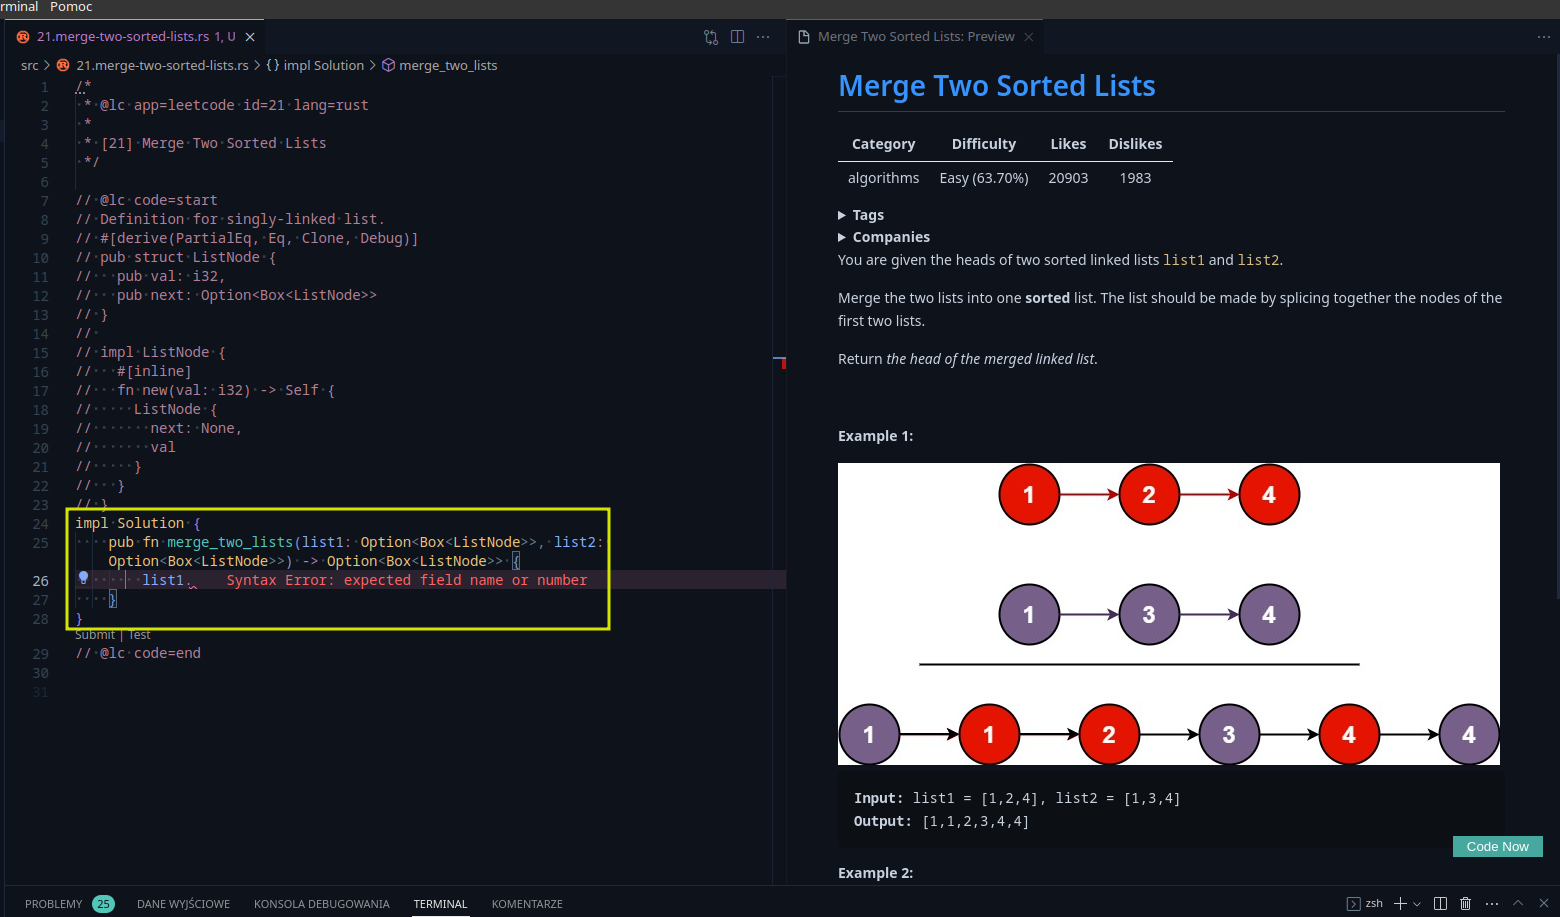
The value of this header is our session cookie, which we can copy and paste into the VSCode extension dialog box. After that, we should be able to view our progress and solve problems in the editor, without having to leave it. However, there is a catch. We will be able to click on problems, view their descriptions and open them in separate windows using the Code Now button, but the Rust syntax analyzer won't recognize the code as a valid Rust code, because it is not a part of a Cargo project.
So we've got our environment set up, but we are still missing some of the features that we would normally have in a Cargo project. To fix that, we need to dress up our LeetCode problems codebase as a sudo-Cargo project, where each problem is a separate public module and the main file is a binary entrypoint that imports those modules. There is of course no need to compile this mystical binary source since we are only interested in the syntax analyzer and the autocomplete features.
One binary to rule them all

My LeetCode problems are stored in a directory called .leetcode in my home directory, which is a Cargo project named also leetcode (yeah, don't expect any creativity from me when it comes to naming things in this case, all of this is just for Cargo to be happy). Inside it, there is a src directory, which contains a main.rs - our umbrella entrypoint for rust-analyzer to be able to analyze code located in other files. Everything looks like this:
.leetcode/
└── src/
   ├── main.rs                # umbrella binary (only for analysis, not run)
   ├── easy/
   │   ├── 1.two-sum.rs
   │   ├── 21.merge-two-sorted-lists.rs
   │   └── 70.climbing-stairs.rs
   ├── medium/
   │   ├── 2.add-two-numbers.rs
   │   ├── 46.permutations.rs
   │   └── 102.binary-tree-level-order-traversal.rs
   └── hard/
      ├── 23.merge-k-sorted-lists.rs
      └── 76.minimum-window-substring.rs
As You can see, the source files for the actual problems are separated into additional directories, which are named after the difficulty of the problem. This is just a personal preference, but I like to keep things tidy and organized, so I can easily find what I am looking for. But why they are named according to this pattern: <problem-number>.<problem-name>.rs? Well, this is how the LeetCode extension names the files when it downloads them from the website. In other words, when You choose a problem from the extension menu called "[21] Merge Two Sorted Lists", the extension will download the problem description and the code stub for it, and save it in the pre-defined directory as 21.merge-two-sorted-lists.rs. This generates from the get-go two additional questions to answer:
- What is this pre-defined directory and how it is related to our Cargo project workspace?
- How will we import those files into our
main.rs, since they do not meet the requirements of a valid Rust module name?
The answer to the first question is quite simple - the pre-defined directory is the one that we have specified in the extension settings, which can be accessed by clicking on the gear icon in the extension menu. By default, it is set to ~/.leetcode, which is the same directory that we have used for our Cargo project. I have changed it to ~/.leetcode/src, but to be honest - You can leave it as it is since it will still be visible in the VSCode window containing the open workspace.
The second question is a bit more tricky, but it can be solved by using the #[path = "..."] attribute, which allows us to specify the path to the file that we want to import. This is what the main.rs looks like:
// main.rs – aggregate modules for rust-analyzer
#![allow(dead_code)]

// Each LeetCode file has characters not valid in Rust module names (digits + dots + hyphens).
// Use #[path = "relative/path.rs"] to map an ad‑hoc name to the file.

#[path = "easy/1.two-sum.rs"] mod _1_two_sum;
#[path = "easy/21.merge-two-sorted-lists.rs"] mod _21_merge_two_sorted_lists;
#[path = "medium/2.add-two-numbers.rs"] mod _2_add_two_numbers;

fn main() {
   // Intentionally empty: we open this binary file so rust-analyzer loads all modules.
   println!("LeetCode workspace loaded ({} modules)", 3);
}
So the whole procedure is as follows:
- We choose a problem from the extension menu.
- The extension downloads the problem description and the code stub and saves it in the pre-defined directory.
- I move the code stub to the appropriate directory, according to the problem difficulty e.g.
1.two-sum.rsgoes toeasy/1.two-sum.rs. - I add a new module to the
main.rsfile, which imports the code stub using the#[path = "..."]attribute. - I enjoy the Rust syntax analyzer and autocomplete features while solving the problem in the editor.
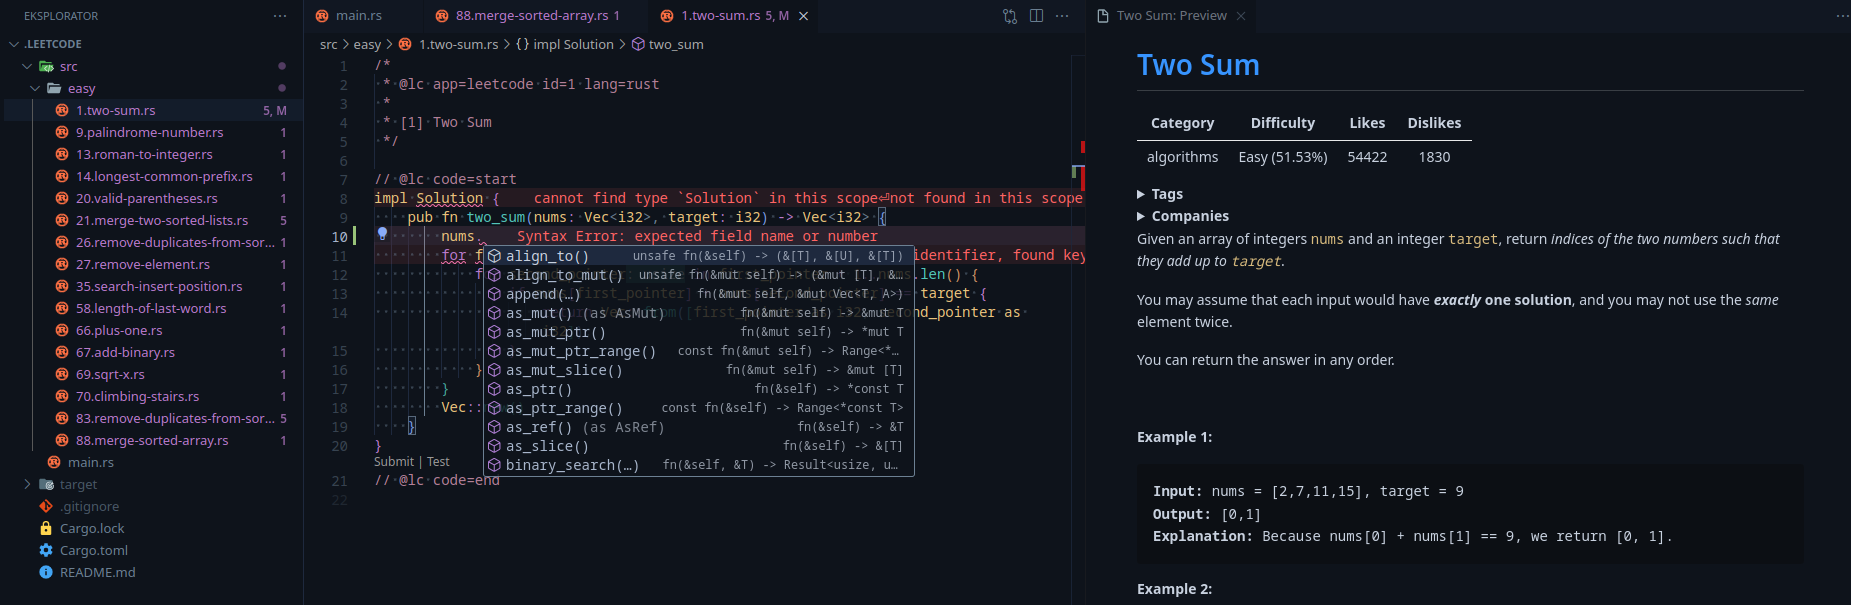
This is how I've managed to make my LeetCode experience more comfortable and enjoyable, without having to leave the editor. I am also managing a log of my progress as a simple Markdown table in the README.md file, where I write down the problem metadata, my scores (speed and memory) and some helpful droplets of wisdom that I've learned while solving the problem. It can show You how these problems fall into certain classifications dictated by the type of algorithms used to solve them like graph traversals or dynamic programming.
Yeah, it really was a quick one, nothing left to see here
Well... almost. A couple of helpful epilog bits while we are here.
Post‑script: auto‑wiring new problems
Manually adding a #[path = ...] mod _X_name; line for every new download is fine for a handful of files, but gets old fast once you binge through dozens. A tiny helper script can scan the directory tree and regenerate the aggregation section of main.rs for you.
Below is a minimalist Python script (drop it next to main.rs or anywhere convenient) that:
- Walks the
easy/,medium/,hard/folders - Produces a stable, sorted list of problem files
- Writes (or updates) a region delimited by marker comments inside
main.rs
#!/usr/bin/env python3
import pathlib, re

ROOT = pathlib.Path(__file__).parent
SRC = ROOT / 'src'
AGG = SRC / 'main.rs'
PROBLEM_DIRS = ['easy', 'medium', 'hard']
START_MARK = '// === AUTO-GENERATED MODULE LIST START ==='
END_MARK = '// === AUTO-GENERATED MODULE LIST END ==='

def norm_module(name: str) -> str:
   # Map `21.merge-two-sorted-lists.rs` -> `_21_merge_two_sorted_lists`
   stem = name.rsplit('.', 1)[0]
   parts = re.split(r'[^A-Za-z0-9]+', stem)
   return '*' + '*'.join(filter(None, parts))

def collect():
   modules = []
   for d in PROBLEM_DIRS:
      for file in sorted((SRC / d).glob('*.rs')):
         modules.append((file, norm_module(file.name)))
   return modules

def render(mods):
   lines = [START_MARK]
   for path, alias in mods:
      rel = path.relative_to(SRC).as_posix()
      lines.append(f"#[path = \"{rel}\"] mod {alias};")
   lines.append(END_MARK)
   return '\n'.join(lines) + '\n'

def main():
   mods = collect()
   block = render(mods)
   if AGG.exists():
      content = AGG.read_text()
      if START_MARK in content and END_MARK in content:
         pattern = re.compile(f'{START_MARK}.*?{END_MARK}', re.S)
         content = pattern.sub(block.strip(), content)
      else:
         content = content.rstrip() + '\n\n' + block
   else:
   content = f"#![allow(dead_code)]\n\n{block}\nfn main() {{}}\n"
   AGG.write_text(content)
   print(f"Rewrote {AGG} with {len(mods)} modules")

if __name__ == '__main__':
   main()
If you prefer pure Rust, a build script (build.rs) could emit an include file, but a one‑off script keeps the project non‑invasive.
Add a pre‑commit hook to keep it always current:
#!/usr/bin/env bash
python3 scripts/gen_mods.py
git add src/main.rs- Turn on inlay hints (parameter & chaining) – they shine when exploring unfamiliar algorithm patterns.
- Use a workspace snippet to scaffold a tests module at the bottom of each problem file (e.g. table‑driven cases for edge conditions).
- Keep a
bench/scratch file with micro‑bench code (even if you don't runcargo bench) to jot down complexity notes right next to solutions.
When to graduate this setup
Once you start revisiting problems for performance tuning (e.g. alternative DP states, different tree traversals) it can pay to convert the ad‑hoc single binary to:
- A Cargo workspace with one crate per difficulty tier, or
- A single crate where each problem becomes an integration test (
tests/leetcode_XXXX.rs).
That lets you run cargo test as a quick regression suite ensuring future refactors don't break solved tasks.
- rust-analyzer Settings Guide: rust-analyzer manual
- Rust Style Guide (fmt defaults): rustfmt repo
- LeetCode Discuss (patterns): Discuss boards
Wrap‑up
That's the whole comfort stack: cookie auth → local file organization → synthetic binary for analysis → (optional) automation for module wiring → future evolution path. Tiny bits of laziness compounding into sustained focus.
Happy rustifying your puzzle grind!